This is the short path from three raw files to a finished scan. It is deliberately just the steps — every number here has a reason behind it, and the reasons are in the manual rather than here.
Note
If something refuses, skip to When it refuses at the bottom. The app never refuses silently: there is always a sentence, and the sentence says what to do.
What you need#
A camera on a copy stand shooting raw, a lamp that can put out three narrow bands one at a time, and a holder that shows the frame and the clear film around it.
That clear border is not spare margin. It is unexposed film base, and it is where the roll's own base density gets read.
1 · Set the lamp#
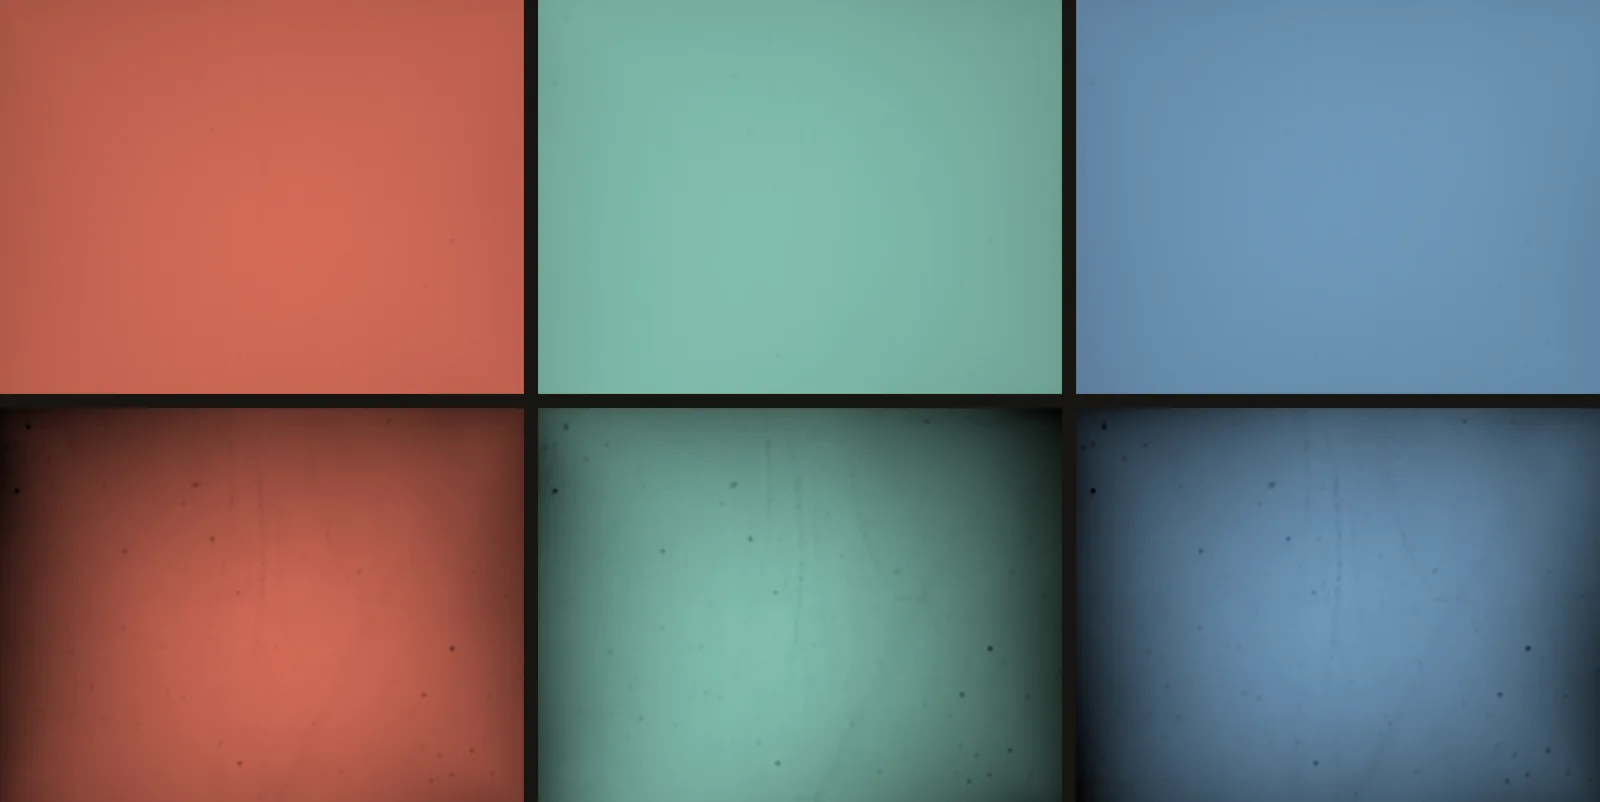
Take the film out and point the camera at the empty gate. Set each band so the sensor fills to between 75 and 90 % of its range, with nothing at the ceiling. Then write the three settings down.
Tip
The three numbers will be nowhere near each other, and that is normal. On one measured rig the three colours ran at 190, 485 and 937 counts per unit of setting — five times apart, over completely different working spans.
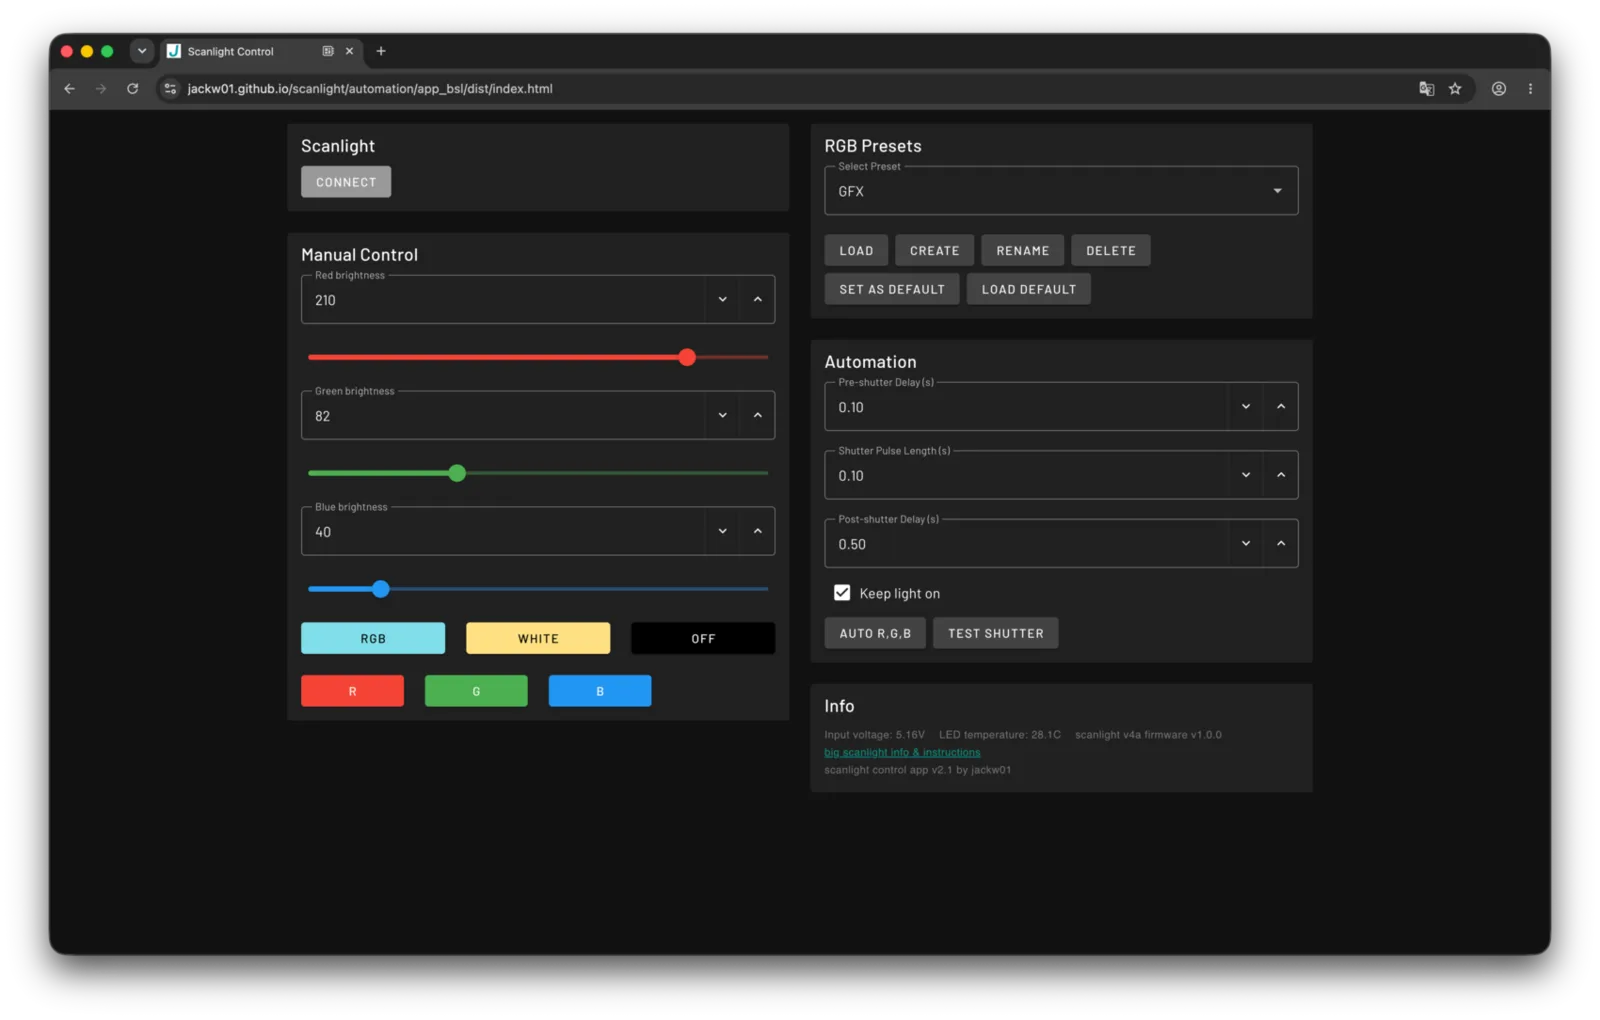
Below 75 % you are throwing away signal-to-noise on every density the roll will ever produce. The top is 90 % rather than 100 % because lamps drift: one was measured moving 1.3 % between two consecutive exposures at the same setting.
If you are using a white lamp instead, the window is different — one broad capture read through the camera's own filters cannot put all three channels in 75–90 %, because green collects roughly twice what red and blue do. For white, stay clear of the ceiling and that is all.
2 · Calibrate the rig#
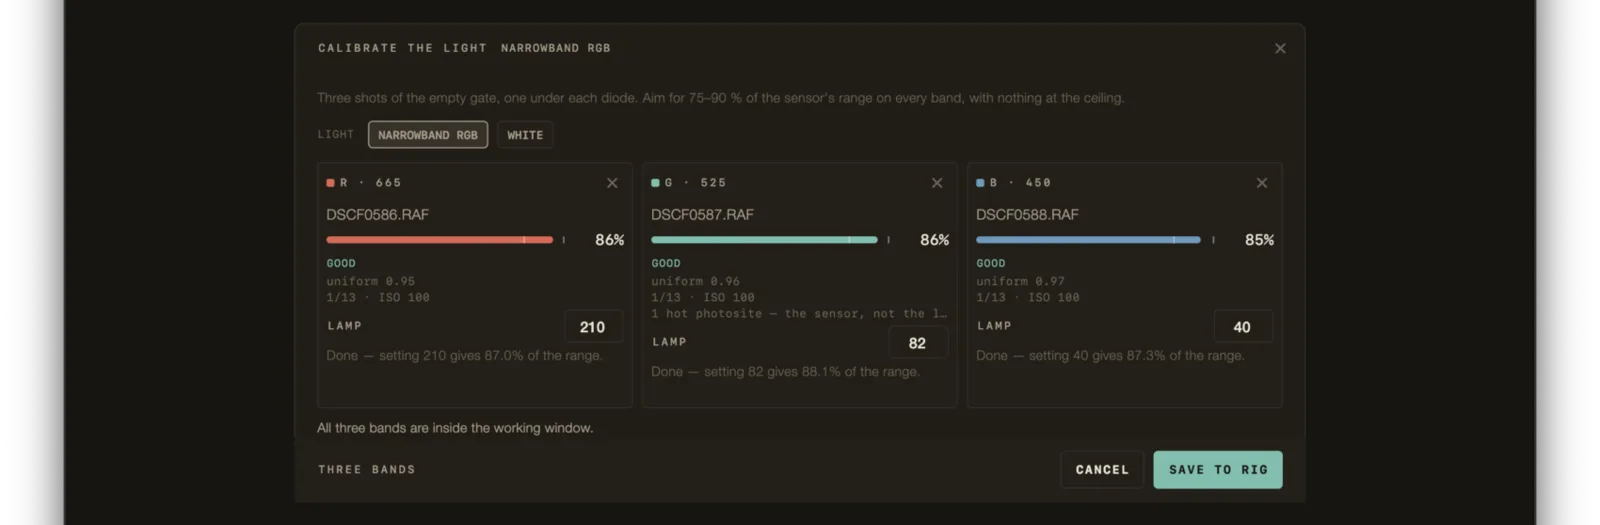
Drop the three empty-gate exposures into CALIBRATE THE LIGHT. Order does not matter and neither do the file names — the band is read out of the image itself.
Important
All three on the same shutter and ISO. A set split across two shutter speeds carries about 90 counts of error into every density on the roll while looking perfectly ordinary — which is why the app refuses to save one.
You do not need GOOD on all three to save. What it insists on is three bands, all
of them actually flats, all on one exposure. A dim flat is a true picture of a dim
light; refusing it would leave the roll with no denominator at all.
Type the lamp settings in while you are there. It is the one number in the whole measurement that cannot be recovered later — the level comes off the pixels, the exposure off the file, the band out of the image, but where the knob was is only ever knowledge from the room.
3 · Shoot the roll#
Three exposures per frame, one per band, without moving the camera or the film between them. Manual exposure throughout.
Shoot three bare-gate frames with every roll and import them along with everything else. It costs about ten seconds.
Tip
A rig calibration is right until the lamp, the lens or the aperture changes — and silently wrong afterwards. Flats shot beside the roll are the only ones that saw the same light the frames did, and they win wherever they exist.
You do not have to name anything. Drop the whole folder in. Which three
exposures belong to one frame is worked out from filenames, capture time and shot
order — and from the pictures themselves, because a red-filtered negative
measures nothing like a blue one. DSCF0001.RAF through DSCF0042.RAF straight
off the card is a roll the app can read.
Which band a file is comes from the image alone, never from its name. A name is typed by hand and has been wrong.
If you would rather make it certain: one folder per channel, or _R _G _B in
the filename. Neither is required — they only shorten the work the grouper does.
4 · Import#
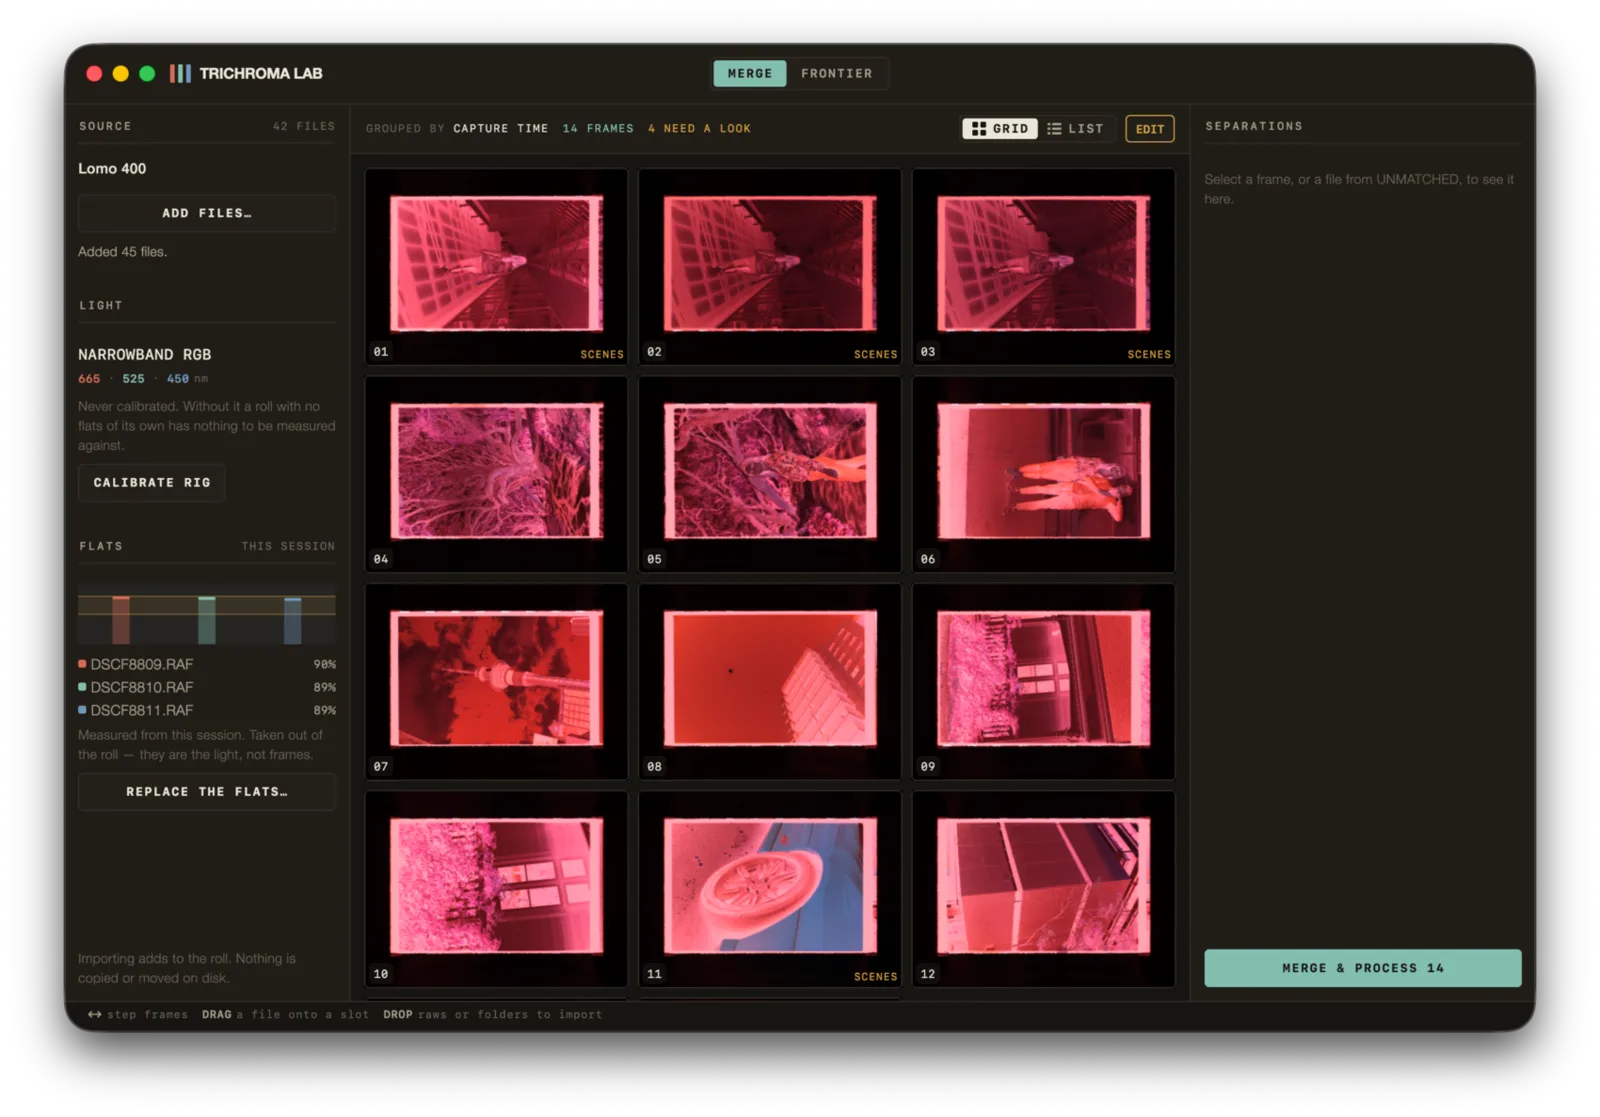
Drop the lot into MERGE. The flats are found and lifted out of the roll before grouping, because three bare-light exposures shot seconds apart look like a perfect frame to the grouper and would otherwise be graded and exported like one.
Four things to check before processing:
| Check | What you want |
|---|---|
| One roll | Only this roll's files — a roll is graded from one base |
| Frame count | What you dropped in, minus the flats, divides by three |
| Flats panel | Three files named, with their levels |
| Separations | Click a frame — the same picture in three different densities |
5 · Mark the base area#
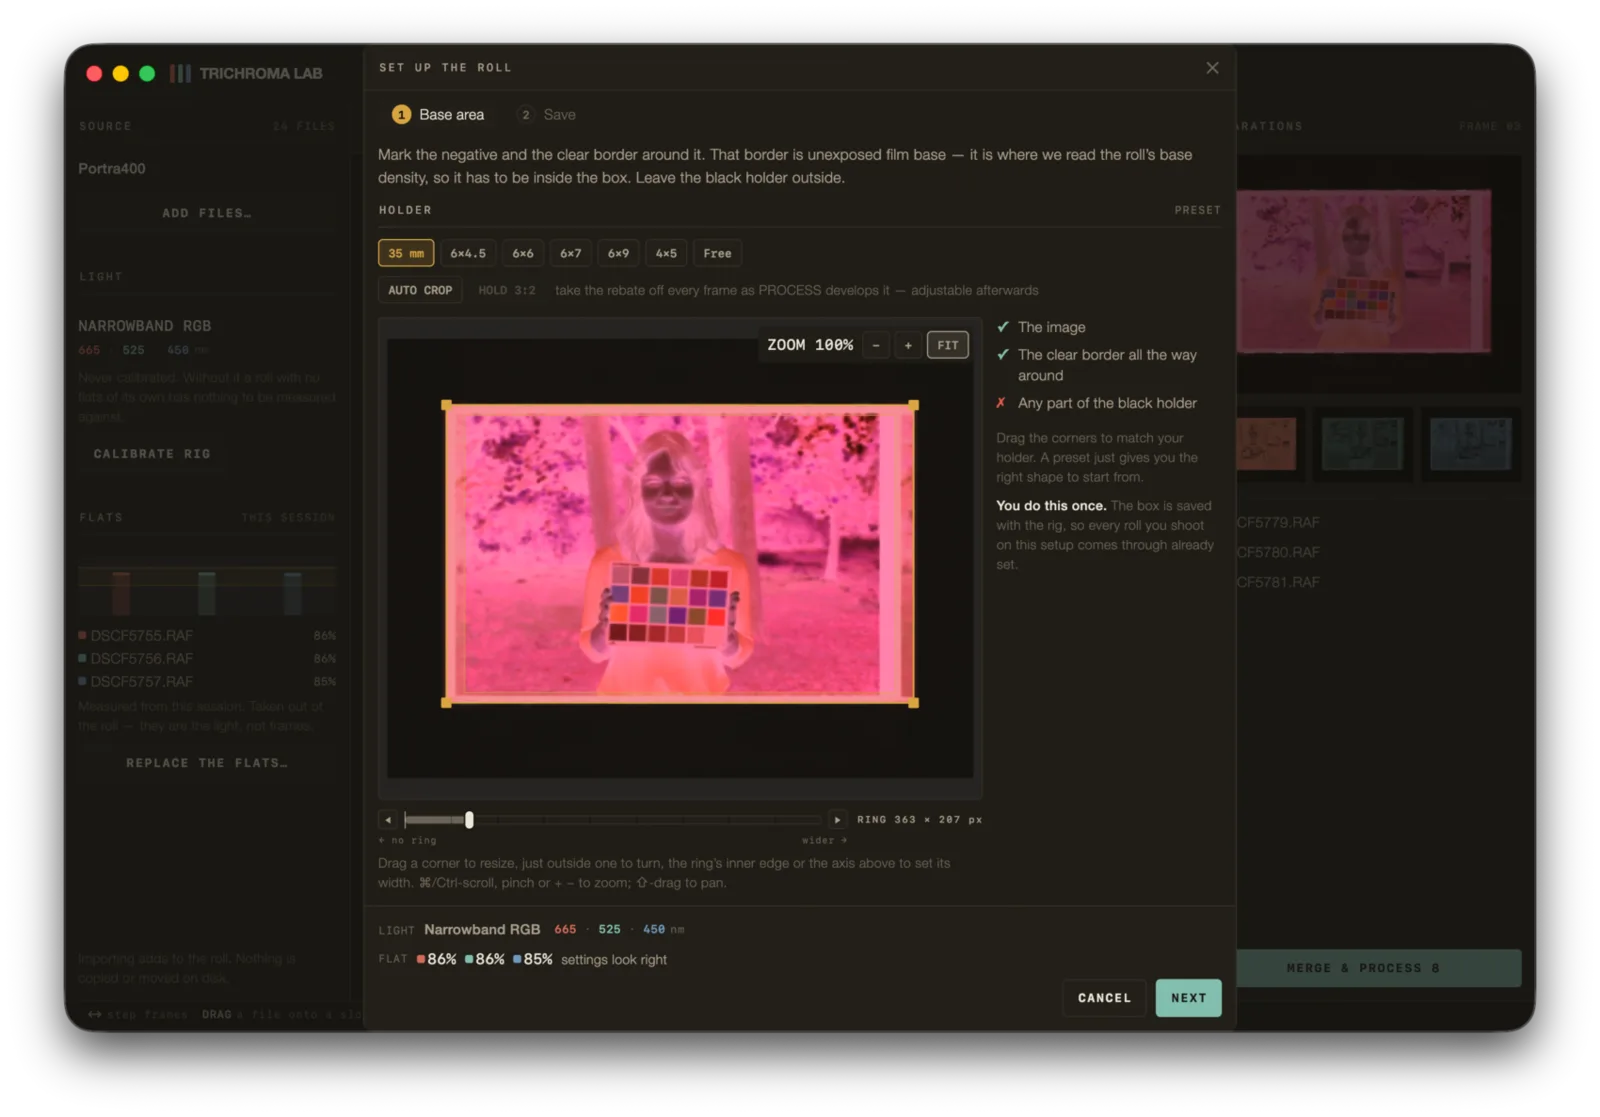
Mark the negative and the clear border around it. Leave the black holder outside the box.
Caution
A sliver of black holder inside the box makes the base read too dense. The whole roll then grades wrong, every frame still looks plausible on its own, and no later correction recovers it. When in doubt, pull the box inward — inward costs precision, outward costs the truth.
You do this once per holder. The box is saved with the rig, so every roll on that setup arrives already set.
Watch the ring — the strip between the box edge and the picture. The sheet prints it in pixels because that is the one unit meaning the same thing on every holder. A ring closed to nothing and remembered once refused every frame of a 41-frame roll while reporting it as a problem with the pixels.
6 · Read the prescan#
Three densities, always rising: red, green, blue. That rising order is the orange mask, and three densities not in that order are refused, because they cannot be a colour negative's base.
Two numbers worth reading rather than skipping:
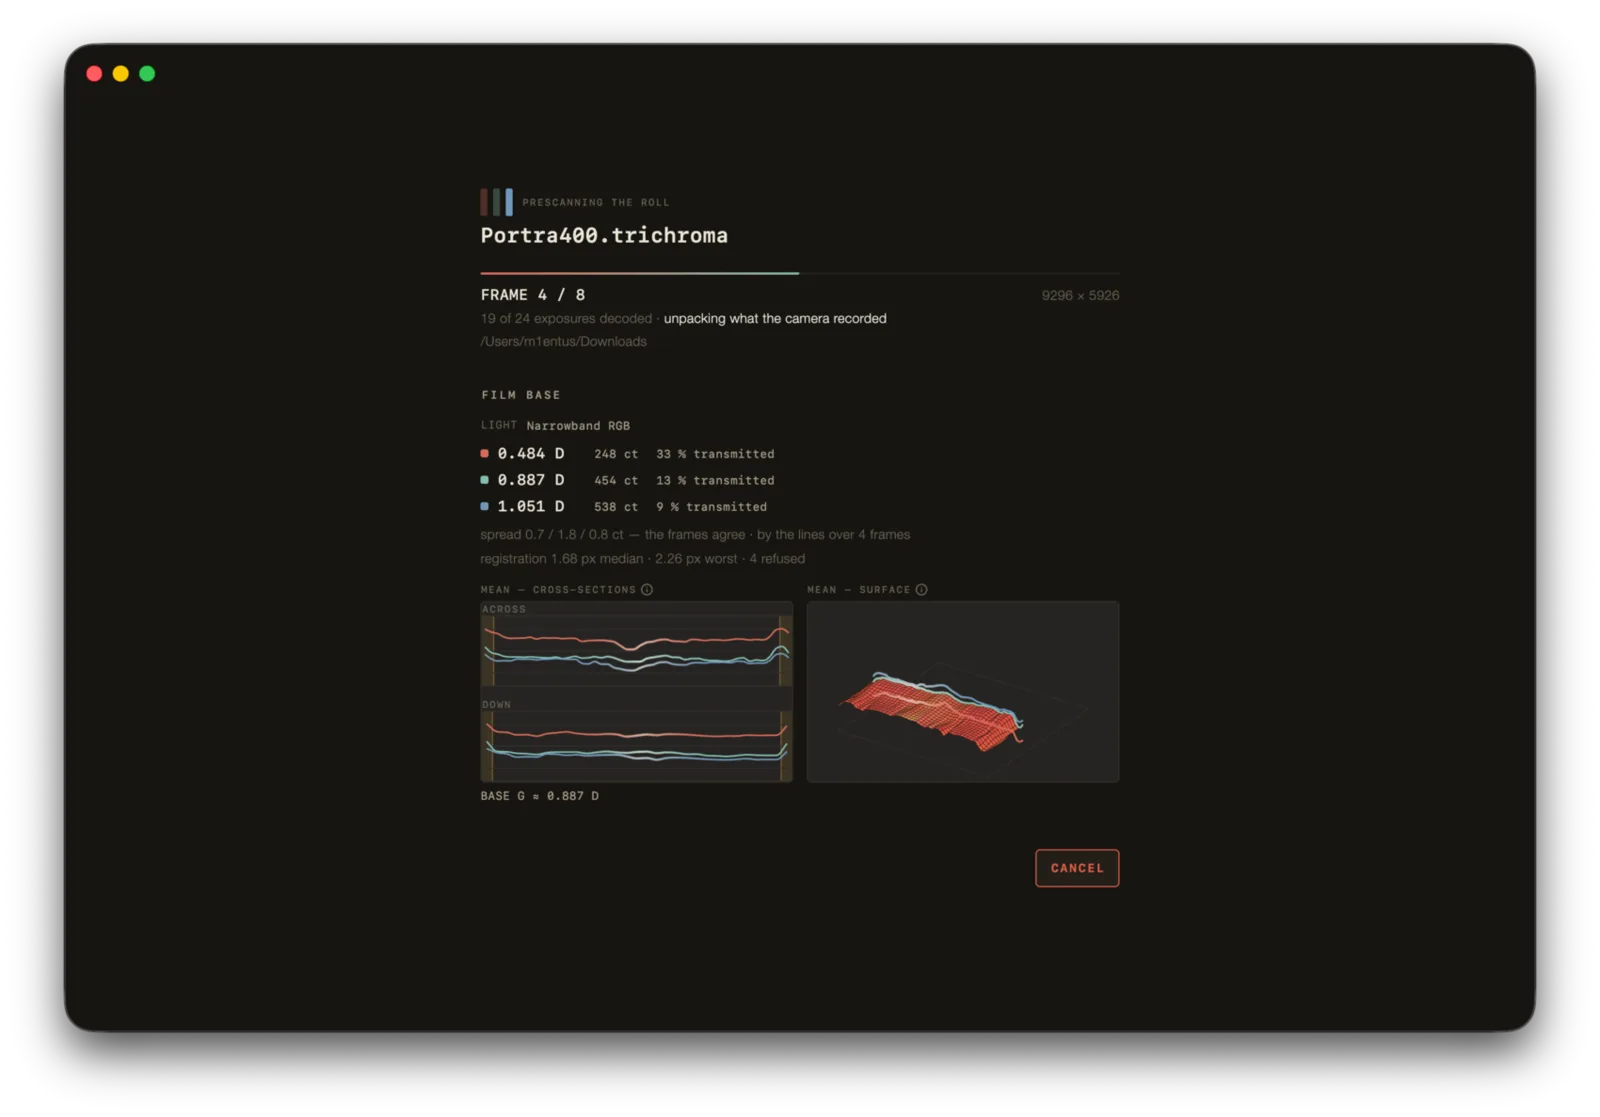
- The spread. Film base is constant within a roll, so every difference between frames is error, not variation. The app calls the frames agreeing when every channel is within 10 counts.
- The registration. Median and worst drift between the three separations, in pixels, plus how many estimates were refused. A refusal changes nothing — the app leaves the pixels alone and says why.
7 · Grade#
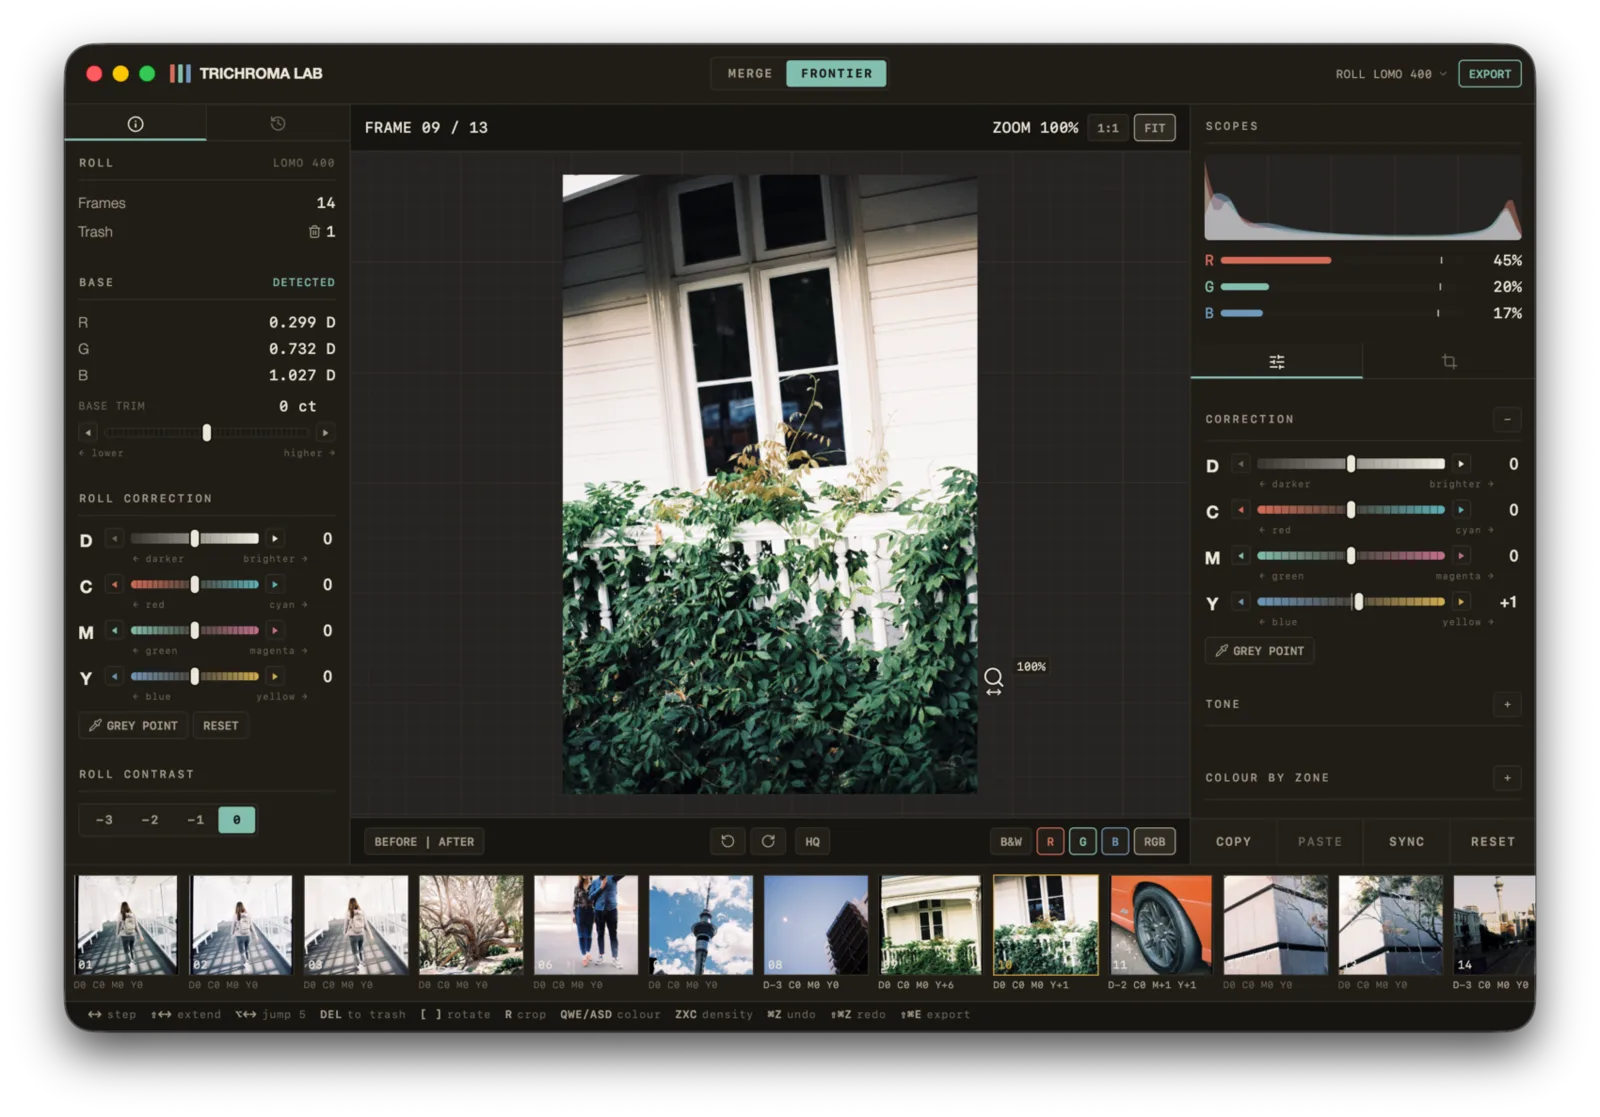
In LAB, four axes — D density, C, M, Y — in both rails. The left rail is the whole roll. The right rail is the frame you are looking at.
Grade the roll first, the frames second. The roll-wide axes are the ground every frame is judged against, and they render live — nothing is re-measured when you move them. A frame renders as its own four numbers plus the roll's.
Two things that surprise people:
- +D is brighter, not darker. The printing convention is deliberately inverted, and Settings turns it round if you came from a printer.
- Hold BEFORE and it strips this frame's rows, never the roll's. What it means is: this frame, before I touched it.
Base trim is a different animal — it moves the measured base itself, so it re-measures the whole roll and waits for APPLY rather than acting as you drag.
8 · Export#
Three formats, and the shape of the list is an honest statement about the machine rather than a product decision:
| Format | What it is |
|---|---|
NEGATIVE |
16-bit linear, no profile — for another converter |
TIFF |
16-bit sRGB, about ten and a half real bits, profile embedded — 8-bit when the colour chain is SCANNER |
JPEG |
8-bit sRGB, profile embedded |
A TIFF positive is sixteen bits by default. That is not sixteen measured bits: the colour chain keeps about ten and a half real bits of tone, and an eight-bit file would round them away. SCANNER — the colour chain on the PREVIEW tab of SETTINGS — rounds at ten bits and writes eight-bit TIFFs. The negative carries no profile on purpose — it is transmittance counts, not a colour space, and stamping sRGB on it would tell every converter downstream to apply a transfer function to numbers that never had one.
Sizes are develop widths rather than resizes, so a smaller export is genuinely cheaper. One warning on that sheet is worth reading: sharpening reaches are in pixels, so a full-resolution export sharpens differently from the canvas you judged it on.
When it refuses#
| It says | Do this |
|---|---|
| Not an empty-gate exposure — this looks like a frame | A frame reached a flat well. Take the film out |
| Clipped past measuring | Cut the light by about a third |
| Photosites at the ceiling | Back the light off until nothing touches the top |
| These were not all shot on the same shutter and ISO | Re-shoot the set on one exposure |
| Running off the film | The base area reaches past the film's edge — pull the box in |
| The base area is on the holder, or the film is fogged or dense | Both causes are named because both happen. Check the box first |
If every frame refuses as denser than any film base and the readings agree with each other, the film is probably fogged. The app recognises that: it refuses the base outright and grades the roll without one, which is what a lab scanner does with the same film.
Where the reasoning is#
Everything above is the what. There is a manual that carries the why — how the base is measured and why it has to be, why the window is 75–90 %, what the rebate is for, and the mistakes that have actually been made on this bench, each with what it cost. Ask on the forum for any of it.